
Guitar Recording Crash Course
By Robert Keyes
Get it right at the source! Avoid the "fix it in the mix mentality"
Acoustic Guitar
What sound are you looking for???? Think about the sound you want. Can you hear it in your head? Is it something you've heard before? Position, microphone techniques, and the room play are a big part in the sound that gets captured by the mic/s. The goal is to get the instrument sounding like you want it to sound on the recording.
Position: Test your room! Walk around with the guitar. Play to the corners, play to the center, spin around. Find the position where your guitar sounds best. This is where you want to start. You may feel more comfortable sitting in the middle of the room, but this may not be ideal for recording.
Eliminate noise sources: Chair squeeks, cable pulls, buttons, jewlery, and "ahem"... body noises can create more work later. Turn off any fans, AC units and anything that makes back round noise. A few precautions before hitting the red button can save you hours of editing/filtering later.
Microphone selection: Not everyone has access to expensive mics. Don't let this stop you! I've used both highly directional sm57's, and large diaphragm condensors for acoustic guitar. However, investment in a directional instrument mic (or 2) can make your job easier.
Microphone Placement: There are many different microphone configurations that work for recording acoustic guitar.
1. Spaced Pair: Use 2 directional mics (one at the neck pointed at the 8th fret, and one near the lower bout pointing at the 12th fret). The idea is that one captures the tone while the other captures string resonance. When mixing you have control of both. Though directional mics are ideal, I've used a pair of large diaphragm condensor mics in this same configuration with great results.
2. Vertical spaced pair: Use 2 directional mics (one above the guitar pointed at the high strings and one below the guitar pointed at the low strings. Both mics should be in line with the space between the soundhole and the neck. When mixing you have control of the blend between the lower/higher register strings.
3. Single mic. If you only have one mic you still have options! The key to using a single mic is to know your spacing. A dynamic mic should be no more than 6 inches from the strings aimed at the space between the sound hole and the neck. (positioning your mic farther away will result in a thin sound). When using a condensor mic you can be as far away as 2.5 feet from the strings and still retain a good low frequency response.
I still spend a good amount of time with microphone placement when preparing to record. I use a high quality set of headphones to test my configuration making small adjustments to the mic position paying attention to the tone I'm hearing and the amount of room reflection present.
Pickup systems: For those who aren't aware, many acoustic guitars have a pickup system installed. Some are better than others, these systems make performing on stage easier but usually fall short in sound quality in comparision to using microphones. These systems aren't without value in the studio. Below is my dirty little acoustic/electric secret. shhhhhh...
Robert's dirty little acoustic/electric secret:
I use 2 large diaphragm condensor mics in the "Spaced Pair" configuration above. This gives me both my sound hole tone and neck resonance. Then I connect the pickup system to a compressor (or channel to be compressed in the DAW). Finally, I use any mic on hand positioned 10 feet away to capture the room. (Even $20 radio shack mics I have employed for this purpose). Once I record my track I start mixing the "spaced pairs" first. I find I like to pan the sound hole mic at 10 o' clock and the neck mic at 3 o'clock. I compress the pickup system and incorporate it in to the mix panned at 12 o'clock. Keep this level low! It's only there to enhance what's already there! The room mic I position at 9'o clock to give me a touch of room to the mix. viola! Now you know the secret I've used on many albums over the years!
Electric Guitar
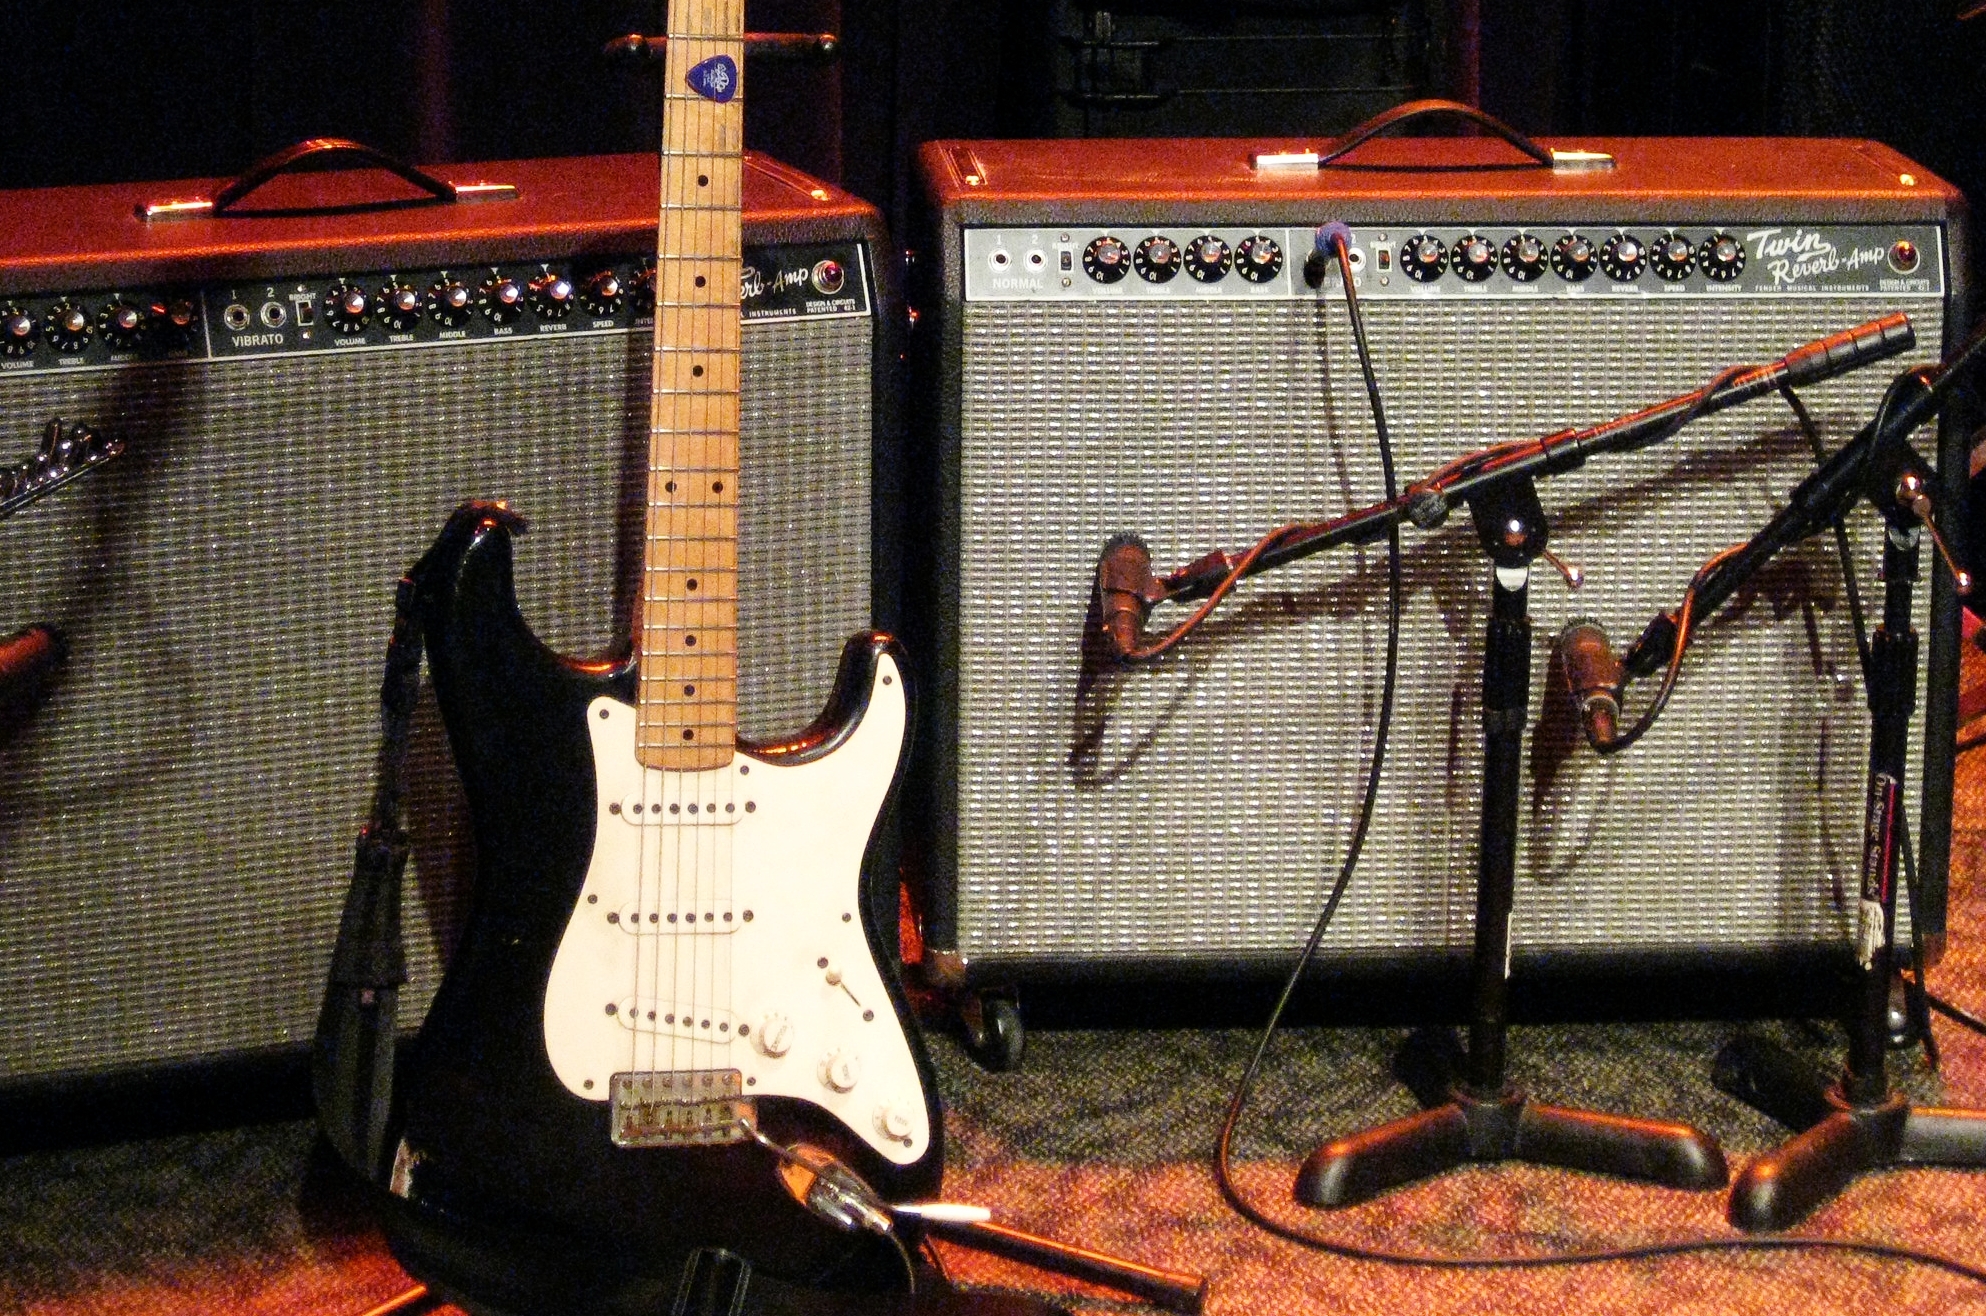
Mic'ing an amp: Choose wisely. Again, What sound are you looking for? If you're looking for a tight/focused sound, use large cone speakers. If you want it really raunchy, use a smaller speaker. If you don't like the sound of the amp, change amps. Try to get the sound you envision before placing your mics.
Emulated systems: Several amp/cabinet simulators are available (ex: behringer Vamp and the line-6 POD come to mind. Many new amps have an "emulated" output manufacturers promote as an alternative to mic'ing the cab). When you're in an environment where loud noise aren't possible, these units/feature come in handy. Digial processing is seldom a substitution for the real thing, but can get do the job in a pinch. (several of my recordings have been done using the line 6 POD 2.0 when other options weren't available. I still keep one around for this purpose)
Testing the room: Just like I discussed previously with acoustic guitars, try positioning your amp in different parts of the room. Even though the most common instrument microphones are highly directional, the room does make a difference. Find the spot where your amp sounds the most focused. This is where you want to start.
Eliminate noise sources: Harmonic induction from flourescent lights is a common problem (especially in situations where the guitar player is using single coil pickups). Heating/Cooling systems can also be a common culprit as well. If you're getting electrical buzz through your amp, seek out and eliminate these issues before you start recording. Though it isn't impossible to remove noise after the recording is done, your recording will sound much better if you solve the problem before hitting the red button.
Microphone Selection: The most common mic for use with an amplifier is a highly directional dynamic mic (There's that Shure SM57 again). The SM57 captures the frequency range of electric guitar nicely and when exposed to high pressure sound levels it has almost a limiting effect on the sound which can make mixing easier.
Positioning your microphone: If you're looking for a bright tone, the general rule is to aim the mic at the center of the speaker at a 22-degree angle two to four inches from the cone. For a warmer tone, aim your mic halfway between the center and the outside of the cone. If you're using an open back cabinet it can be helpful to put an additional mic behind the cab (note: the sound from this mic will be out of phase with the front mic. You can use a phase switch on your interface or inside your recording software to remedy this.
Condensor and ribbon microphones can be used if you follow a few guidelines:
If your mic has a “pad” or “-10db” switch, use it. The high pressure levels the amplifier provides can overdrive your mic.
Position your mic two or more feet away from the amp. To prevent rattles and vibrations from the microphone itself.
Mixing:
So you've laid your tracks and are ready to start mixing. Congratulations! You've done the hard part. The goal of mixing is to position your tracks in the stereo field and eliminate conflicting frequencies that can clash and create a muddy sound. Though mixing is in effect a science, it's also an art. Two mix engineers may have totally different ideas of what they want from the mix. Both may be sonically correct but will sound different to the listener. Below are a few guidelines to help:
Stacking multiple like sounds (sounds that share the same frequencies) can be a sonic disaster. Try to distribute your sounds around the stereo field and use an equalizer to clear some frequencies that are clashing. (note: in regard to equalizers I follow this simple rule. To mix, reduce the gain on the frequencies you want to reduce/remove. Increasing the gain is handy for creating an effect, not for mixing. Reduce gain to mix, Increase gain to create an effect.
Always test your mix in mono. I'll never forget the experience of listening to one of my mixes on the radio when the guitars in the chorus completely disappeared! Upon further analysis I found that these guitars were completly out of phase and panned hard left and right. When these channels were combined the tracks cancelled eachother out. Always test your mixes in mono!
Avoid exessive EQ. If my experience has taught me anything, it's that equalizers should be used carefully. Too many changes to the frequency spectrum on a guitar track can leave the track sounding unnatural. If there is a synth or other instrument conflicting with the guitar, try cutting some of those frequencies first. This way you preserve the integrity of the instrument you worked so hard to get the right sound from.
Avoid excessive effects! Ok, lets face it! Effects are cool. We love them! However, sometimes the urge to stack choruses, flangers, reverbs, and delays on our track becomes more trouble than it's worth. Here's my rule! Only use one of each type of effect. If you're using a modulation (chorus, flanger, phaser, tremelo), use only one of these on a track. These are time based effects that are very similar in nature. Stacking them on top of each other can muddy the track and create phase problems. Delays and reverb are also similar in nature but can be carefully used on the same track as long as the mixture still lets the original sound shine through. I can't tell you how many demos I've heard where the guitars were soaked in reverb that the intent of the song was lost. I usually add modulation effects and time based effects after the track has been laid. Effects from combos and pedals have their uses, but recording them means you're stuck with whatever you recorded. Any error in selecting the right effect setting cannot be undone at this point. You have to track it again.
Compressors can be complicated. (a subject that could easily warrant an entire class) Rather than dig in to how they work, various types, or the controls of these devices, I'll simply say this. “The best compression is the compression you can't hear.“ If you can hear your compressor working, you are using too much! The best way to accomplish this is to use your compressor as a “send” effect rather than an insert effect. An insert effect runs the entire signal through the compressor where a send allows you to blend the compressed signal in to your mix. I use compressors to add more strength to the track.
The tools and techniques to record guitars are argued heavily between engineers. Though no rule is absolute, the guidelines presented here are intended to help cover the basics of guitar recording. I encourage creative experimentation with the methods I've described. There always is another way. It's easy to get lost in the science of mixing and effects (I've been there many times with positive and not so positive results). When things get convoluted just remember the first question: What sound am I looking for?
Searching for more information? Call us: 503.393.4437. Or you can use the instrument research request link below. An Uptown Music amplication expert will research and get back to you with options.